Column settings
- 1. Introduction
- 2. New columns, Name and Description
- 3. Data Type
- 4. Required
- 5. Lock
- 6. Limits
- 7. Deleting and repositioning a column
- 8. Save Changes
Introduction
Only the template administrator can change column settings, and this can only be done when data collection is closed.
However, column settings can also be beneficial to moderators and users. They can view all the limits and description of each column and understand how the value limits of one column are dependent on the values of another.
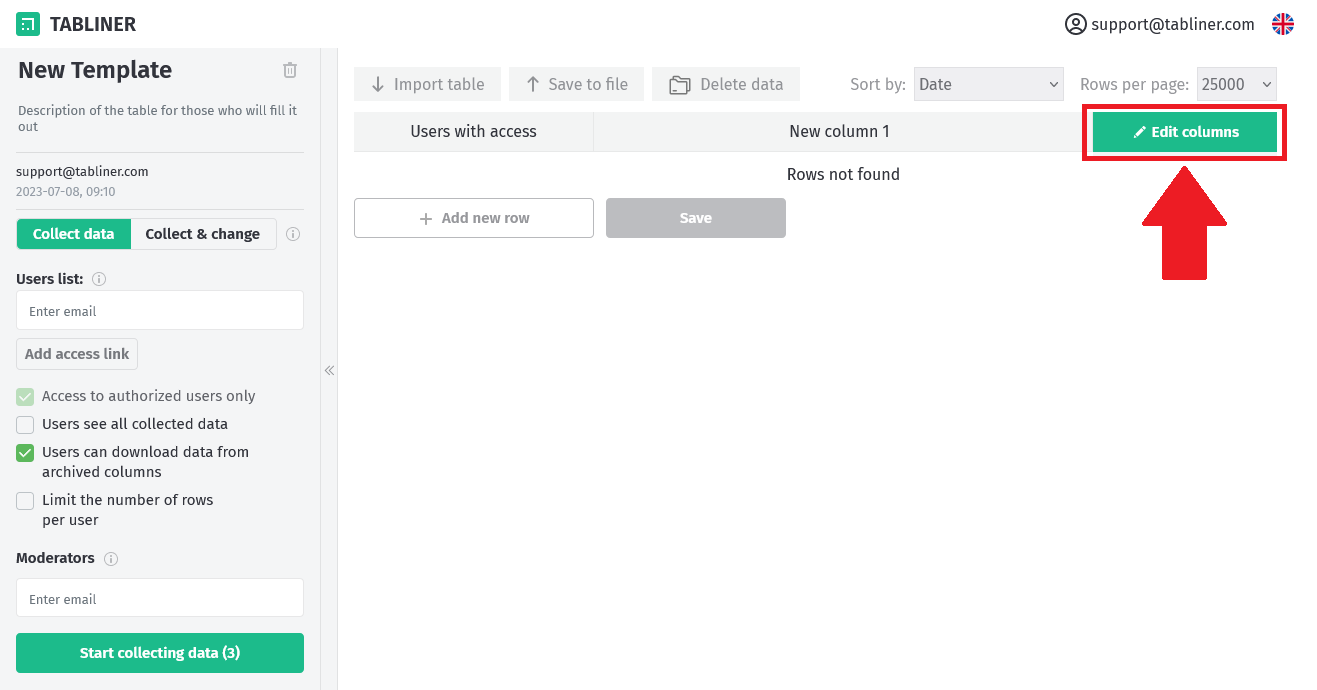
To open the column settings, the template administrator needs to click on the "Edit Columns" button located at the top right of the template table. Moderators and users can access these settings by clicking on the "Column settings" button. If data collection is running, the "Column settings" button is also used by the administrator.
After making any changes to these settings, the administrator must save them by clicking on the "Save changes" button. If not, these changes will be lost once the window is closed.
New columns, Name and Description
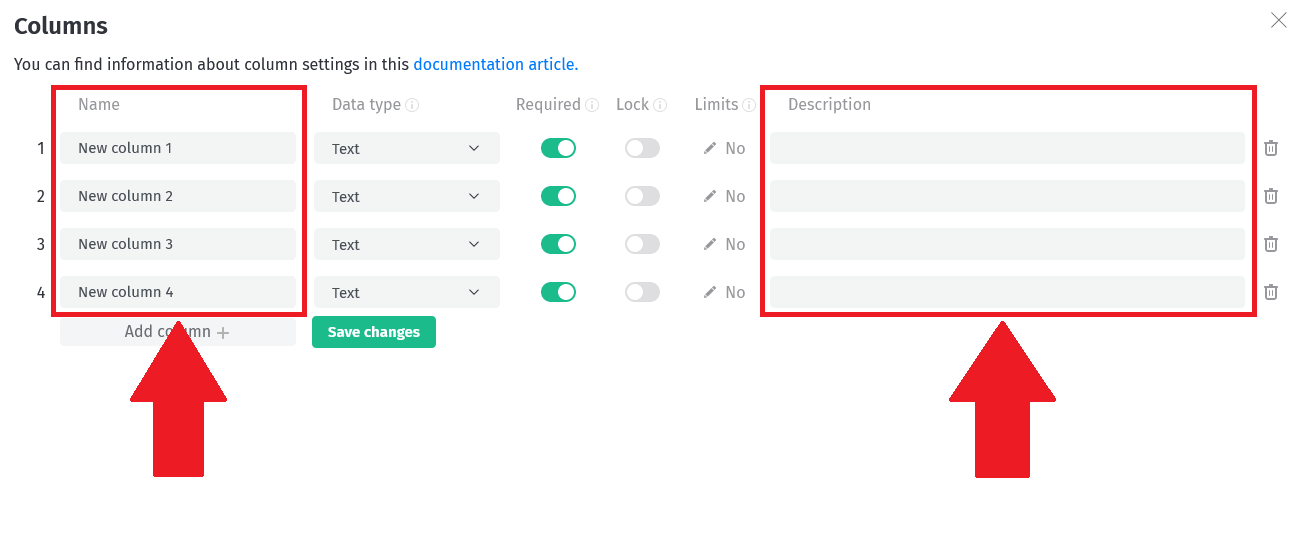
We recommend starting by adding as many columns as you need, by clicking the "Add Column" button.
Next, assign a name to each column. These names will be used when importing and exporting data to spreadsheets. We recommend not using long names for columns. For a more precise description of the column's content, use the "Description" field.
Data Type
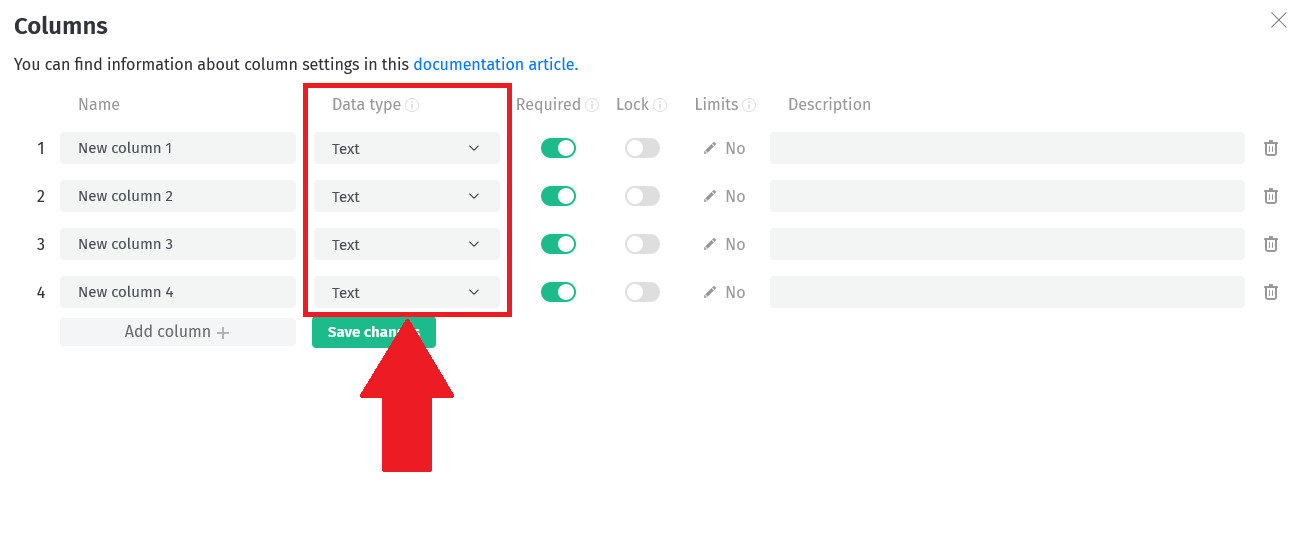
The Data Type of a column determines what kind of data can be entered into it, as well as what limits can be applied to the column's values. The data type of a column is a crucial aspect of configuring your template. Available data types:
- Integer: A column of this type only accepts whole numbers. Any characters other than digits or a minus sign at the beginning of a number will result in an error.
- Number: A column of this type accepts any numerical values, including decimals. A minus sign can also be placed at the beginning of the number. The whole and decimal parts of a number are separated using a dot. Any characters other than digits, a minus sign, and a decimal point will result in an error.
- Date: Columns of this type only accept dates in the YYYY-MM-DD format. The dates can also be entered via a calendar interface.
- Date and time: Columns of this type accept dates and times only in the format YYYY-MM-DD HH:mm:ss. The date and time can be entered via a calendar interface.
- Time: Columns of this type accept time in HH:mm:ss format only.
- Text: Columns of this type can accept data in any form, and values will be interpreted as text.
Choosing the right column data type will allow you to fine-tune the value limits, get the results you want every time, and make it easier for users to enter those values.
Required
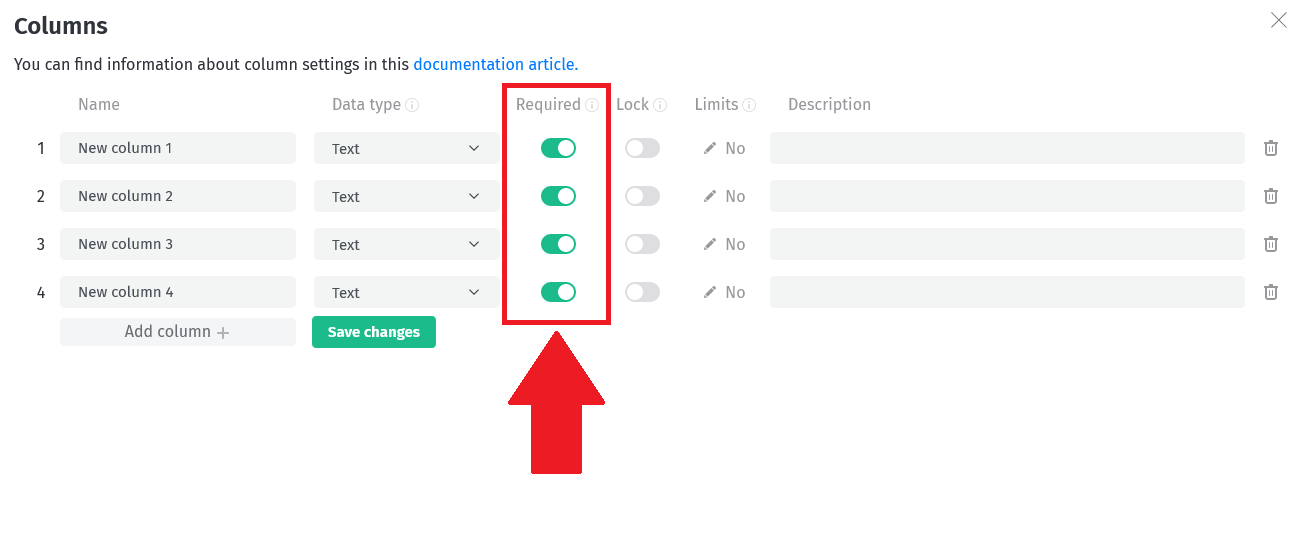
The "Required" option determines whether the cells of this column can be left blank.
By default, "Required" is enabled when adding a column, which prevents the column cells from being left blank. If this option is disabled, users can leave the column cells blank when entering data.
This option works regardless of data type and limits. It means that if it's disabled, then the column cells with any data type and limits can be left blank.
Lock
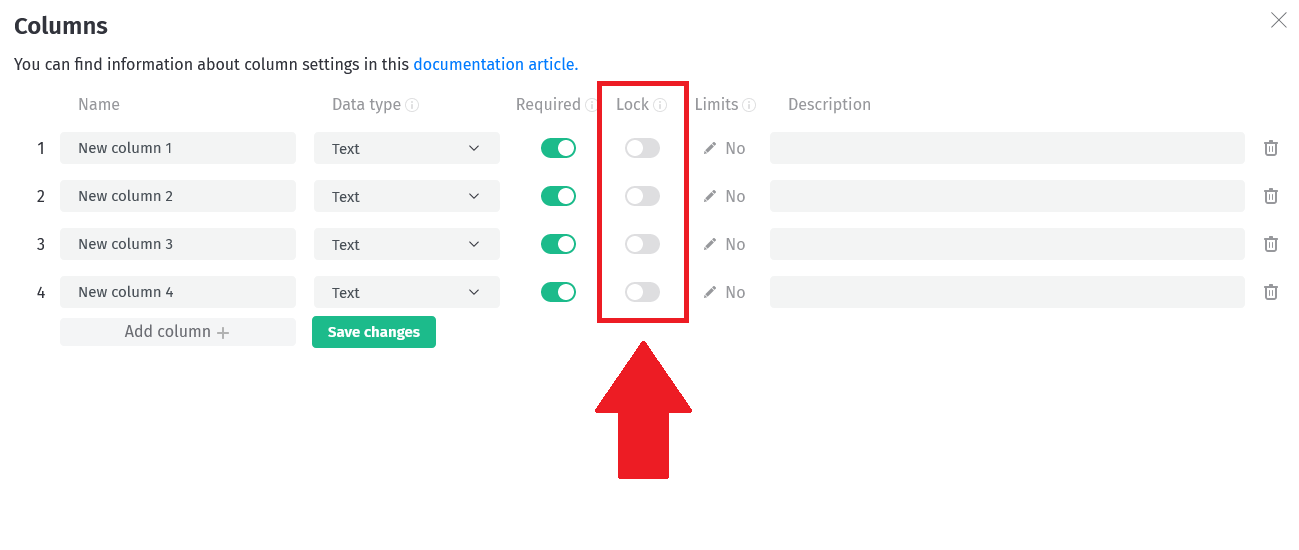
The "Lock" option determines whether users can edit column cells (this doesn't apply to the administrator or moderators).
It's disabled by default, which means that users can fill in or change the cells in this column. If it is enabled, then only the administrator or moderators will be able to fill in or change the values in the cells.
You should be careful with this option in combination with the "Required" option. If both options are enabled in the same column, then users will not be able to add new rows to the table, since the column will require a value, but will be locked for changes. In this case, only the administrator and moderators will be able to add new rows. Users will only be able to edit the values when the "Collect & Change" data collection mode is active, and if they have access to these rows.
Limits
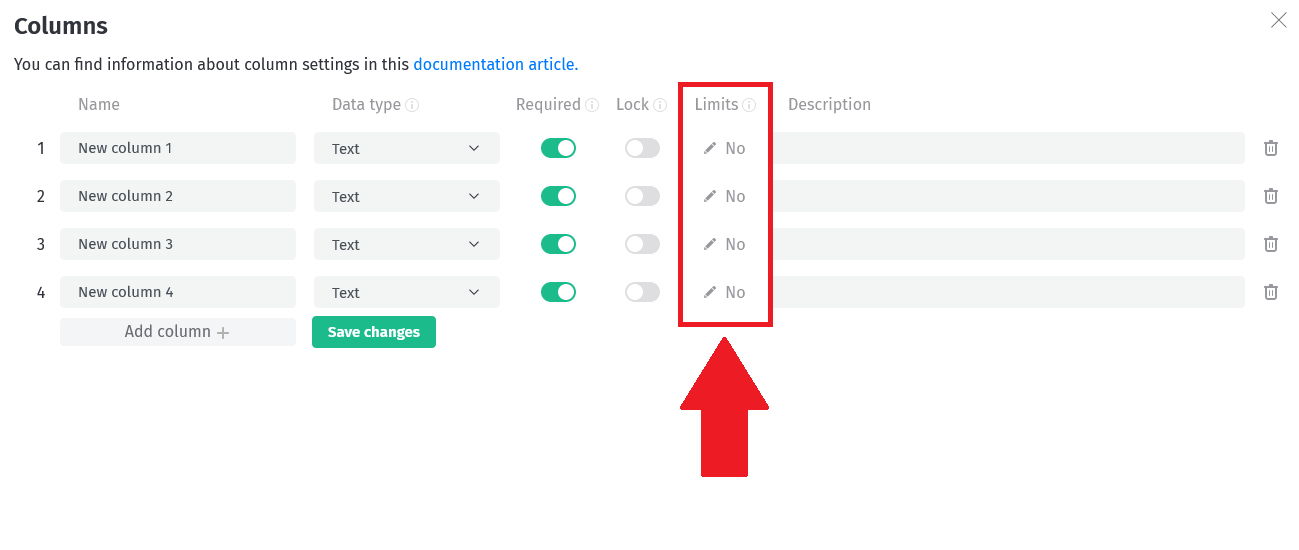
The "Limits" option opens the column limits settings menu (press the "Yes"/"No" button for this), where you can set the values that are allowed to be entered in this column.
For example:
A column named "Age" with the data type "Integer" could have a limit set to "MORE OR EQUAL" to 0 - this would not accept values less than 0.
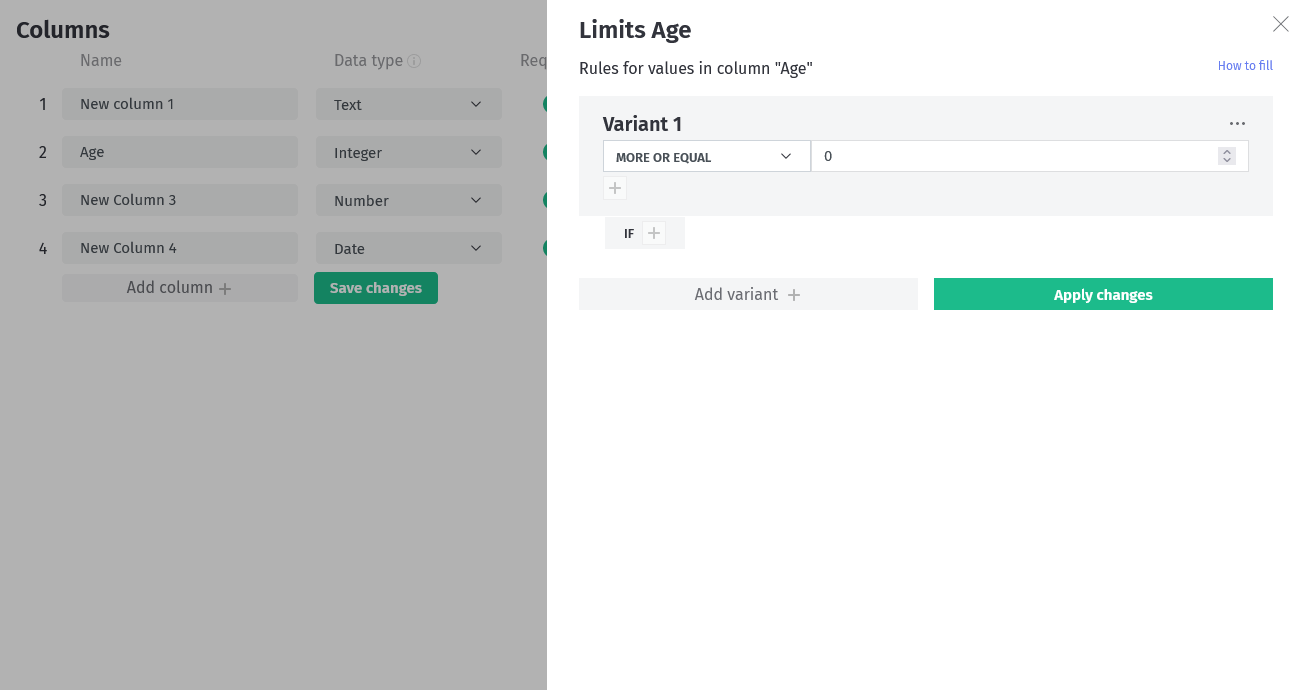
You can also set limits on the values of one column based on certain values in another column.
For example:
In a table with two columns "Product Name" and "Unit":
- Column "Product Name" has a data type of "Text"
- Column "Unit" has a data type of "Text" and a limit of "ONE OF LIST": "liter", "gallon"
- IF column "Product Name" is "ONE OF LIST": "Water", "Milk", "Juice"
This would only accept the values "liter" or "gallon" in the column "Unit", when the value of column "Product Name" is "Water", "Milk", or "Juice".
The possible limits depend on the data type of the column. For example, if the data type of the column is "Number", then the limits "MORE", "LESS", and so on will be available, which would not be applicable for the "Text" data type.
After making any changes to the "Limits", you must apply them by clicking on the "Apply Changes" button. If not, these changes will not be applied once the column limits window is closed. After applying these changes, you can continue working with the column settings, but if you don't save your changes to the column settings afterwards, these Limits won't be saved either.
Read more about column limits settings in the "Column limits settings" article.
Deleting and repositioning a column
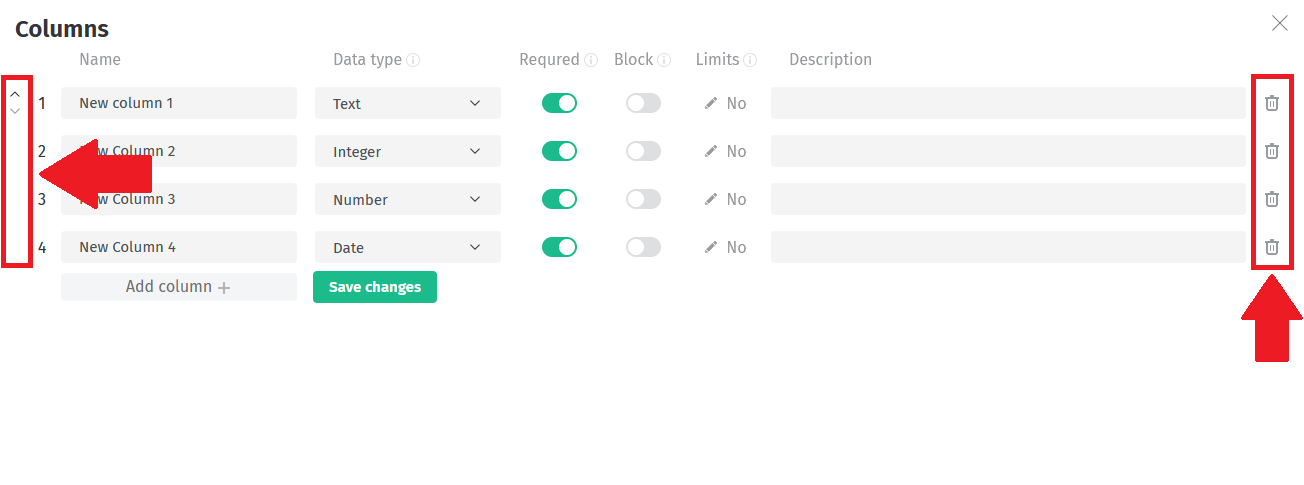
You can delete a column by clicking on the trash button to the right of it. If limits on other columns depend on this column, then you should delete or change those limits first to avoid errors.
You can reposition a column to the left of its name. Up and down arrows will appear after hovering the mouse cursor over a column.
Save Changes
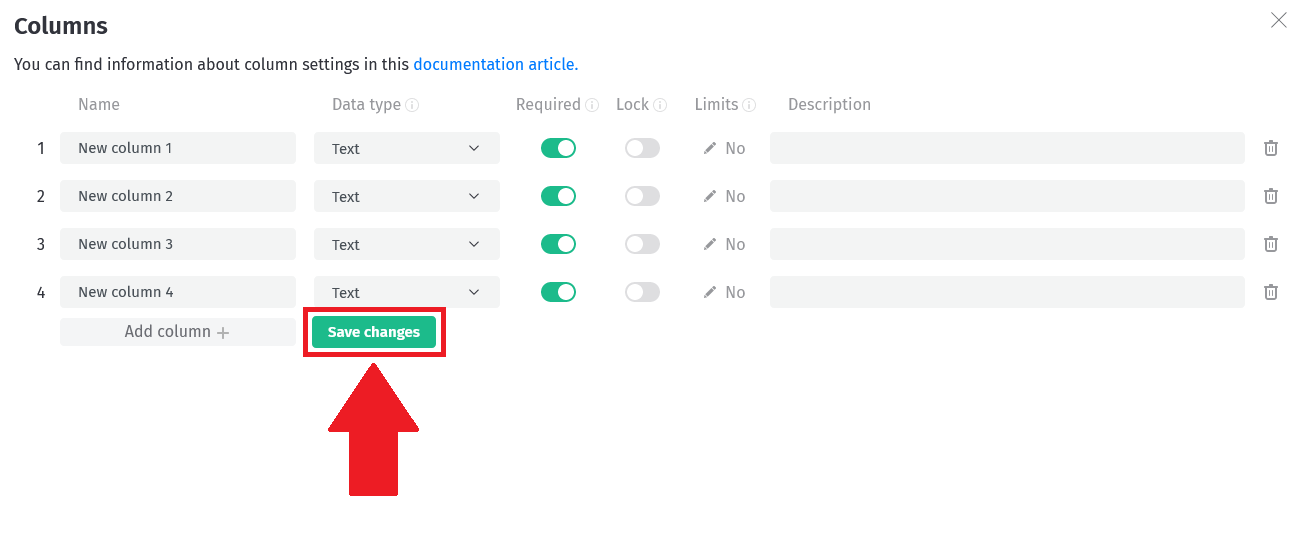
After making changes to the column settings, you need to save them by clicking the "Save Changes" button below. If you don't do this, then when you close the window, all settings will revert to the last saved version.
If changes have been made to the "Limits" option of the column, they must also be saved (not just applied), or they will be lost.
